The Policy Simulator,
in plain steps.
A standalone tool that visually shows what access a user is granted, based on the policies you've configured in PlainID's authorization console (PAP). Point it at a PDP, describe a user, and see the decision in real time.
What it does
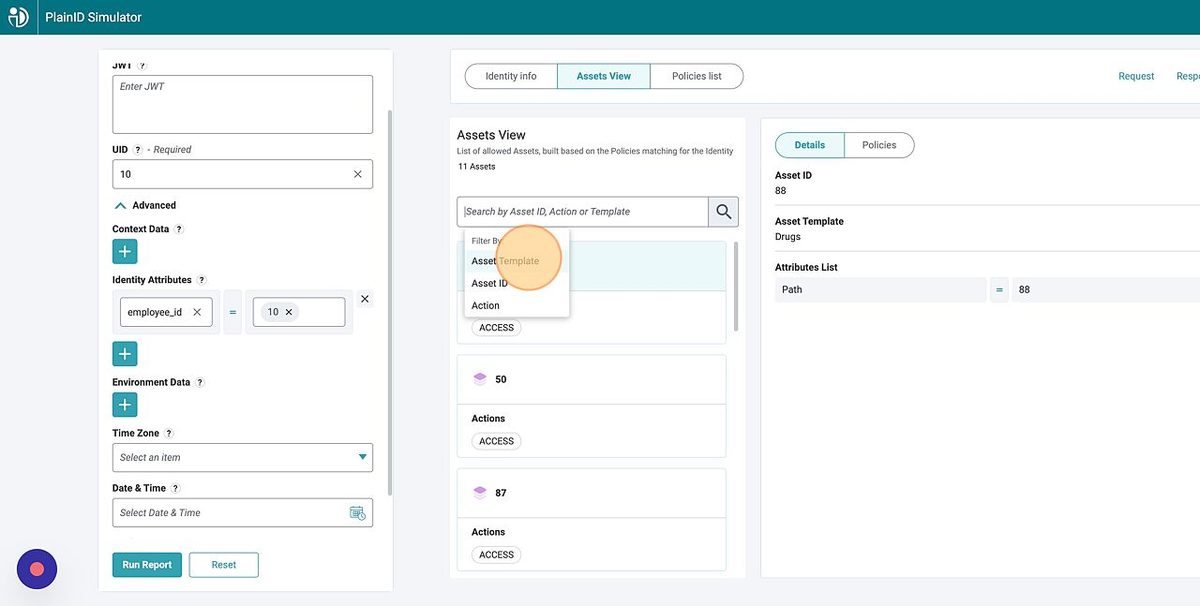
The Simulator calculates access decisions live, using your input parameters, any external data gathered by the PIP, and the policies attached to your scope. It visualizes two PlainID PDP endpoints.
Asset Resolution
An open-ended question for one user — returns every asset they're allowed to reach and the actions they can take, for a given application. (Formerly "User Access Token.")
Policy Resolution
Returns the logical data filtering and/or the list of allowed data items for that user in a specific table.
Getting access
Run it as a hosted SaaS tenant, or pull the Docker image and run it locally.
Option A — SaaS
Just open the hosted app: simulator.operations-ext.plainid.cloud/app
Option B — Local (Docker)
Pull the image plainid/runtime-simulator:latest from PlainID's Docker Hub. Default container port is 8080.
# Run it, mapping host port 5003 → container 8080
docker run -p 5003:8080 -e ENABLE_LOG_FILE=true -idt plainid/runtime-simulator:latest

# Then open
localhost:5003- ENABLE_LOG_FILE
- Defaults to
false(logs go to the console). Set totrueto write logs to files under/home/node/app/logs.
Connect a PDP
Point the Simulator at either the cloud-based PDP or a locally hosted PAA. Open the Settings (gear) icon and fill in three required fields.
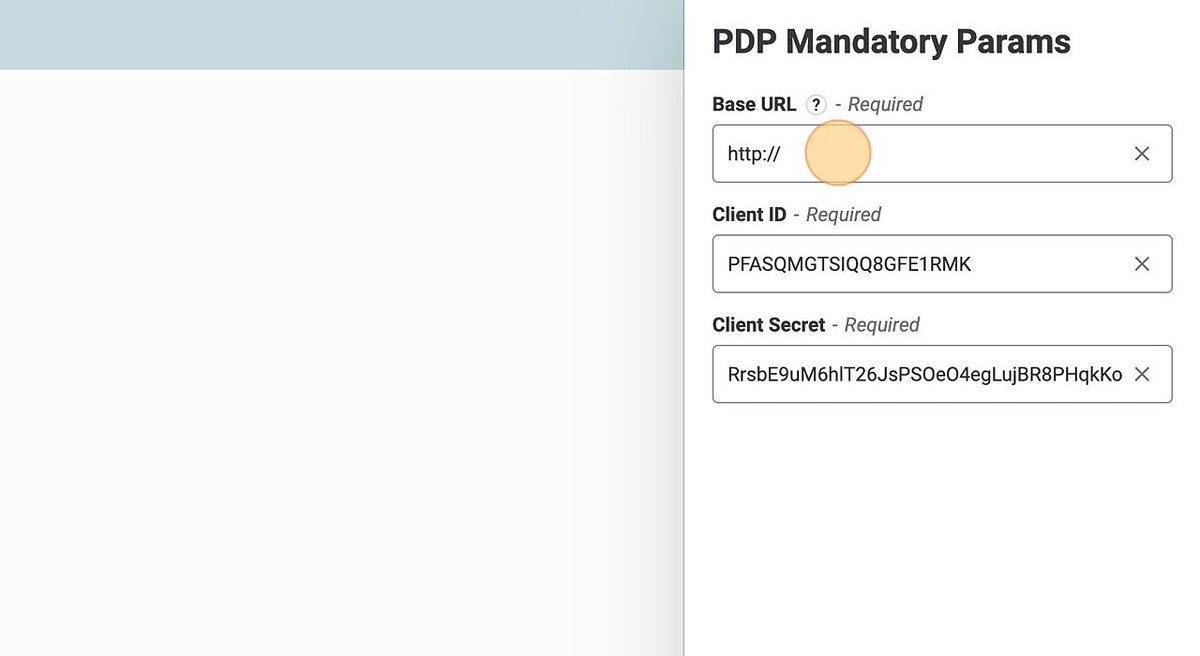
- Base URL. Where requests are sent.
- Client ID. Identifies your scope.
- Client Secret. The key for that scope.
- Click Save.
Picking the right Base URL
Cloud PDP
Use the tenant base URL, e.g. demo.us1.plainid.io
PAA-based PDP
Point at the specific agent and include /api, e.g. 10.0.136.148:8010/api
✓
global-services.us1.plainid.io ✗ global-services.us1.plainid.io/appWhere to find Client ID & Secret
In your PlainID tenant: Environment Settings → Scopes → select (or create) a scope. The Client ID lives here. For the secret, click Manage Keys on the same page and generate a new key.
Build a request
Choose what you're asking, who you're asking about, then optionally layer on context.
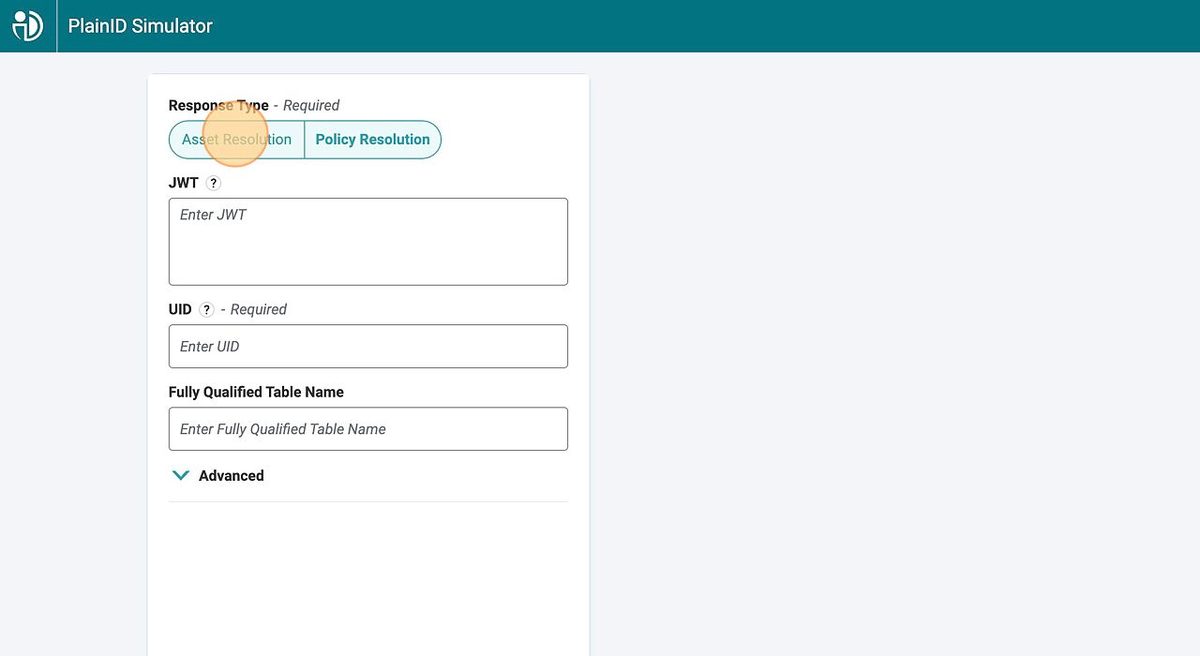
- Pick a Response Type — Asset Resolution or Policy Resolution.
- Choose the identity source — paste a JWT or enter a UID.
- For Policy Resolution, also supply the target table's fully qualified name.
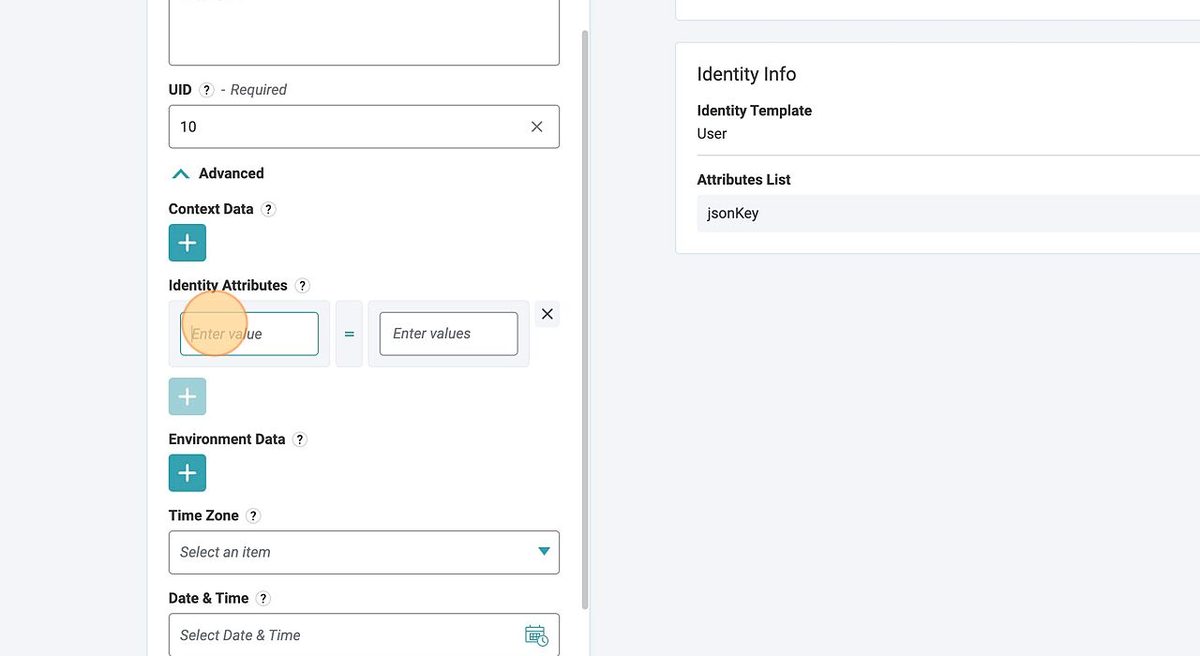
- (Optional) open Advanced to add context, attributes, environment, and time.
- Click Run Report.
What's under "Advanced"
Read the response
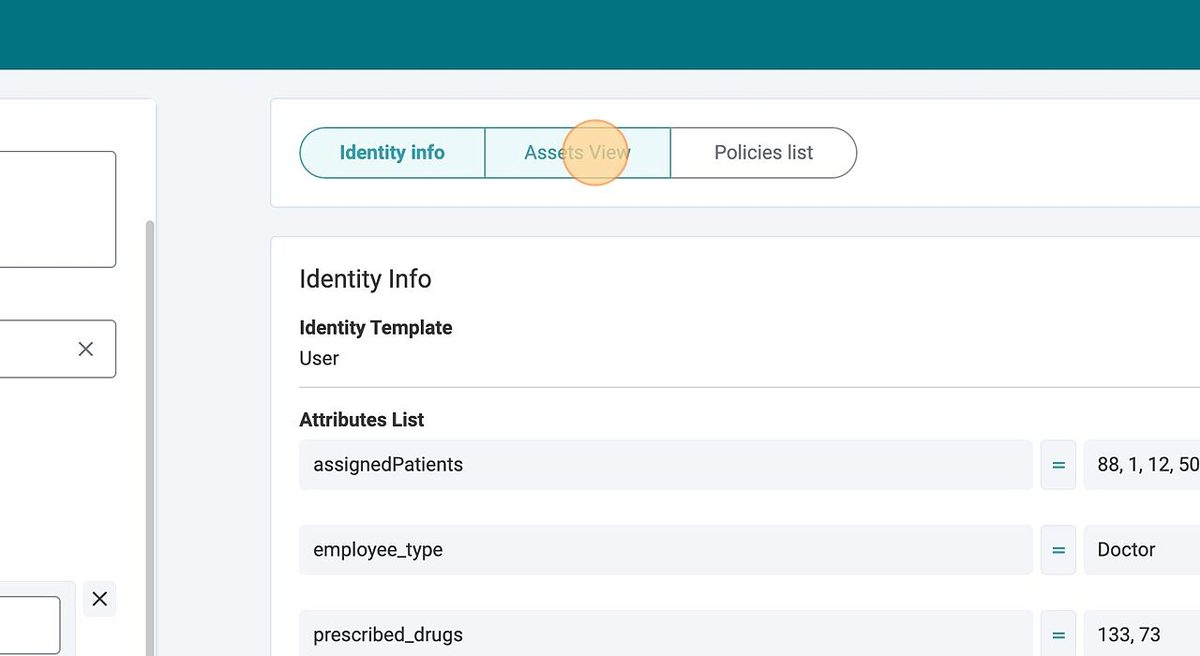
For an Asset Resolution response, results are split across three tabs. (Policy Resolution fields differ slightly.)
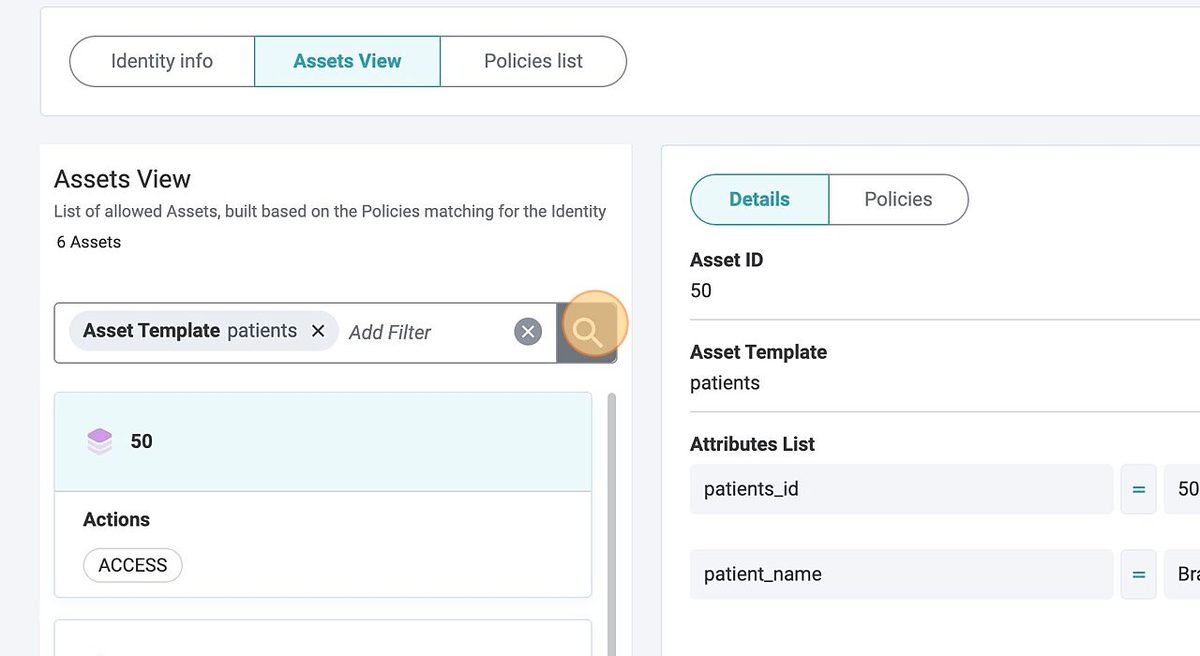
Filtering the Assets View
Use the Search by Asset ID, Action or Template box to narrow a long asset list. Filter by Asset Template, Asset ID, or Action, then add or clear filters with the chips. Selecting an asset opens its Details and Policies on the right.
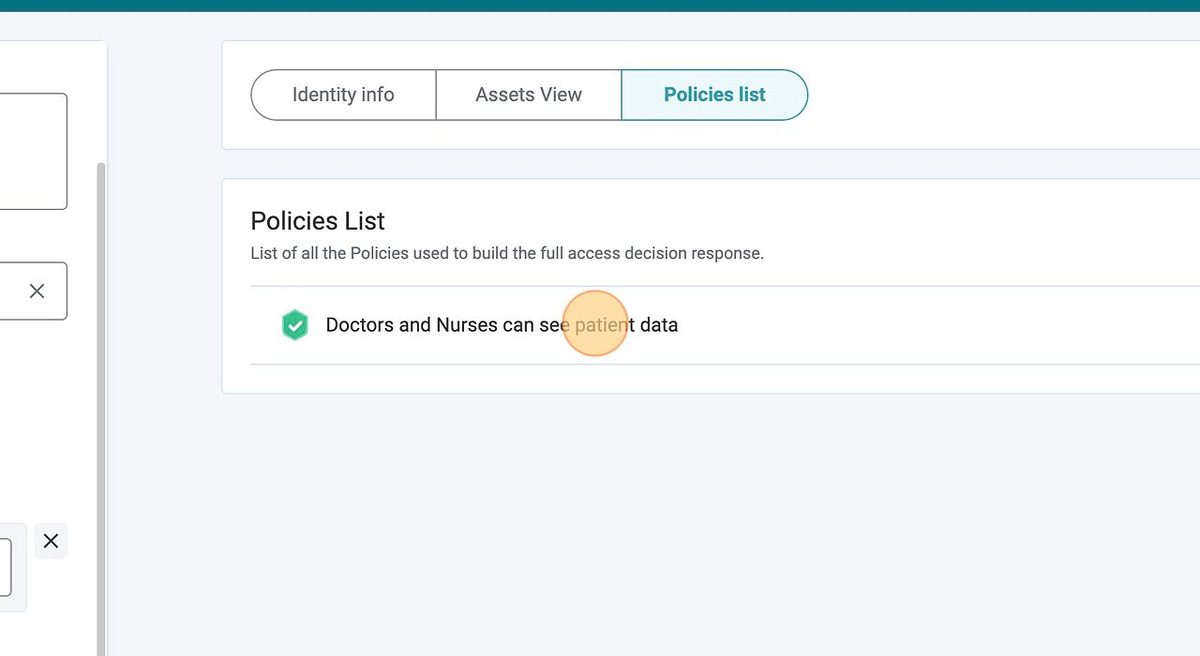
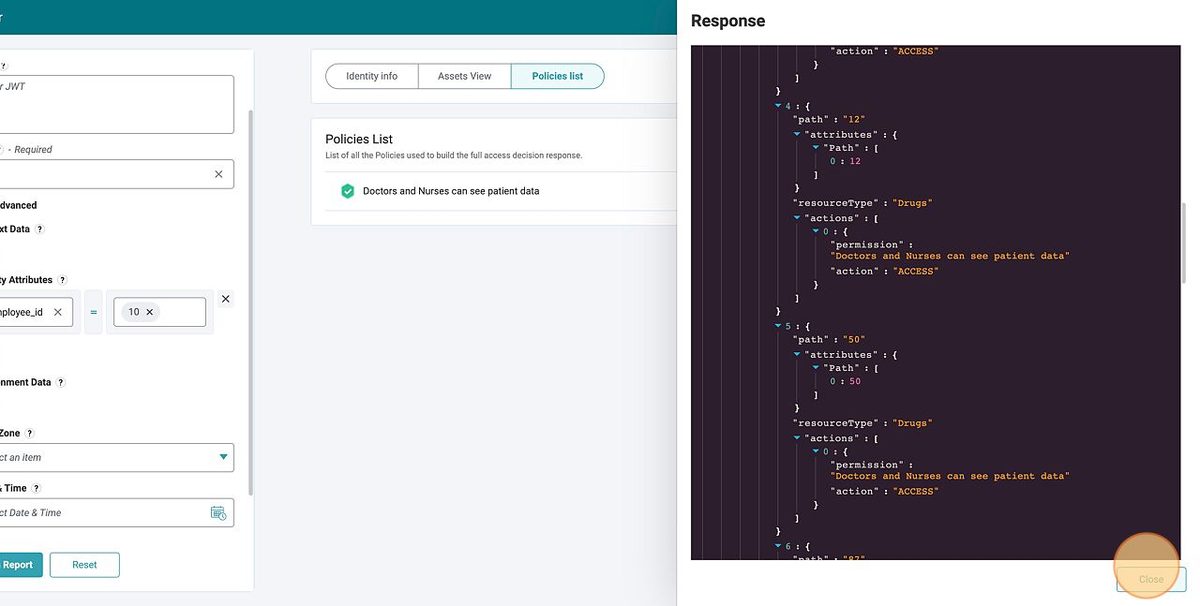
Policies List
The Policies List names every policy that contributed to the decision — useful for confirming why a user got the access they did.
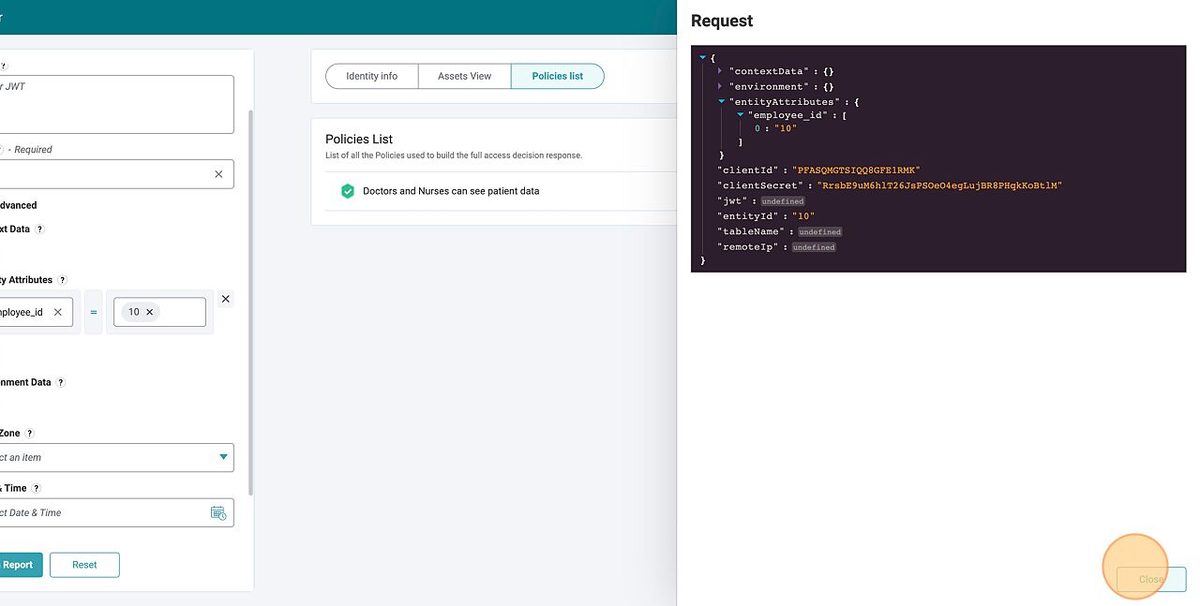
Request & raw JSON
Two tabs let you inspect exactly what went to the PDP and what came back — handy for reproducing a call in Postman or custom code.
Legal notice
The Simulator is a separate, independent component and is not part of the PlainID Authorization platform.
It is acknowledged that: (a) the Simulator is a beta version; (b) it may not represent the final version; (c) it may be limited in capacity and functionality; (d) PlainID may carry out updates that temporarily limit use, including for error correction or new functionality; (e) PlainID may receive technical metrics and usage data (excluding personal information) used for troubleshooting and monitoring; and (f) the Simulator is provided on an "as-is" and "as-available" basis, without warranty of any kind, including warranties of merchantability, fitness for a particular purpose, and non-infringement.